Shiny Things Gallery | Fandom | Other
Shinies from Beast Wars, Ghost in the Shell, Super Mario Brothers, Devil May Cry and more!
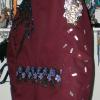
Trigun Jacket
The patches were first, and quick advertisement here: they're from Gainstrive/TulpaWorks, and as of the time I'm writing this, there are both small arm patches and large back patches available. They are beautiful and heat set to the curve of the fabric quickly and without fuss, but as always I sew my patches to the fabric first.
I spent some time thinking about how I wanted to go about things, and then longer trying to find exactly what I was looking for to pull it off. I did get a separate pair of black applique wings that I will probably use for a different project, but that just didn't feel right... then this completely weird abstract wing came along and was perfection. Plus it let me bedazzle things with lots of Swarovski crystals and some larger pressed glass beads that came from a bracelet I tore apart a while back for parts. The flower border just kind of happened to strike a chord with me in terms of what I wanted for the waistline, and I ordered just enough length after I took in the back for a better fit, and there happened to be one flower missing from the lace so... I filled it in with a painted ribbon geranium. The, uh... the right sleeve... well, I wanted some confetti, see... Painted some ribbon with layers of iridescent white pigment until they were silver in some light and white in others, and... some of them happen to be smeared with a little dark red alcohol ink. ...You know, for no reason.
And then I was done! Right? Finished! Completed! ...But... Did it need the satin lining? No. Was I going to do it anyway because I really wanted that Stampede look for the jacket, but also darkened to suit the outside color? Ha ha boy I. Learned. Things. Now, full disclosure: the way I finished the seams for a jacket that is mine is not how I would finish the seams for a paying client. Granted I also would have ripped out jacket seams and done the lining properly to be tucked into the jacket folds itself were I doing it for someone else, not to mention at least partially using the sewing machine (depending; this satin turned out to be not that fussy, actually), but this is the rule of "Am I Getting Paid for This? If Not, Then We Do This the Easy Way". Whip stitch versus ladder stitch: easy victory to the whip stitch.
Now it's turned out a lot heavier than it was before, but a lot warmer. I didn't really anticipate that, so I am pleased in multiple ways. As a side note, because I am me and I seek amusement, I... okay, I shaped a very obvious ass into the back of this coat. Vash deserves it. Judge me however you want, but the zipper works, the sleeves roll up and snap in place to reveal a lot more of that gorgeous blue satin, all the snaps on the front still work, the pockets remain functional, and I am deeply pleased with this project.
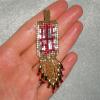
Reminiscence
03 September 2019I hadn't really been thinking of adding the drape at first, but I was already digging around for beads. You know how it is.
(For Sale)
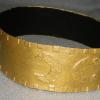
Nera's Choker and Earrings
28 January 2019The earrings themselves are "plunger-style" clip-on gold-plated hoops, gold-plated base metal beads, and... cardboard. Layered, reinforced, hardened, and then made to look like gold. No, it's most definitely not going to bend, warp or fall apart anytime soon. The beads themselves are dangling from 4 extra-strong beading thread... er, threads. So they're dangly!
As for the choker, I tried quite a few fabrics to see if I couldn't simulate the texture and look of gold, and ultimately settled upon some lovely soft suede. With a nice little mostly hidden bar clasp, there's enough comfortable stretch to the suede itself to allow it to be worn without, you know. Choking every time you try to take a drink of something. (I know cosplay isn't about practicality, but I have my priorities.) The jewel is a little sky blue fiber optic/"cat's eye" cabochon.
The gold coloring itself? Took (4-6 layers of) one paint, one pigment wax, two additional iridescent pigments, and a variety of mediums to get that shine.
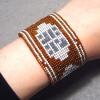
Custom Wedding Journey Cuff
16 July 2016I'd been wanting to do something related to the white robes in thegamecompany's iconic Journey, but like so very many things, never properly got around to it. And then I got a lovely commission request from someone who was planning a Journey-themed wedding. Ideal.
Two full weeks from start to finish, and a whole lot of very careful tension monitoring, anchoring and reinforcing, but wow that result. I'd also agreed to try a new kind of clasp, which at the time was vaguely terrifying. It turned out looking so incredibly nice, though, and was well worth the learning experience.
The Seal of Zeal
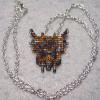
28 March 2015Behold, the seal of Zeal! The Zeal seal. The… symbol generally representing Zeal. From Chrono Trigger. I’m sure you already got that by now.
I was commissioned by the magnificent SchalaKitty for a symbol of Zeal pendant. And then I looked at the sprite. And then I started sweating. SO MANY FLOATING BEADS. Ahem. They inspire my wrath, but I did it. I defeated them. This is actually the second attempt; the first was a test run of the design and color choices, which turned out to be far too subtle. This, this is not subtle.
The end result isn’t quite as perfectly neat as I wanted it to be, but I sacrificed a very small amount of aesthetic value for a heck of a lot more strength and stability, so I think it all works out.
Alfador Pixel Bracelet
18 February 2015A gift for my girlfriend, schalakitty, since she’s kinda into Chrono Trigger or something. It’s the purple cat, Alfador! On a bracelet. Because bracelets. While not technically “pixel perfect”, the minor edits were made as a stylistic choice, and just look at how shiny. Ahem.
Puzzle Box Pendant
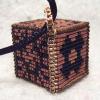
08 January 2015In before tragic reboot. Ahem.
I'd wanted to do a Hellraiser-inspired beadwoven cube for quite a long time, honestly. It took me a long while to finally figure out how I was going to simplify the pattern on the puzzle box, before finally deciding to go extremely simple. The result was unfortunately as much failure as triumph. The cube itself is fully reinforced internally (non-squishy, in other words), solid without actually having sharp corners despite the look of it, though it is somewhat obviously not exactly a cube. My initial plan for getting everything together turned out to be far less stable than I felt comfortable with, so I had to make last minute edits and woe, not-quite-cube and a truly messy bottom portion. Do I know how to fix this for next time? Oh yes, the pattern edits have been made. But it's probably going to be quite a long time before trying again. I'm happy with the result, anyway. Proof of concept and all that.
For Sale
Birdo and Yoshi
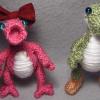
24 December 2014Will I ever attempt these again? 1.) After I get paid in full up front for a commission, and 2.) after I've had some time to bring the mental price down from "infinity dollars".
